• Phone Setup.    
For many beginners (me included), the most accessible camera is the one in their pocket—the smartphone. One of the key advantages of using a phone to capture photos at live events is its simplicity. There are typically no settings to adjust, making it a point-and-shoot experience. Most modern smartphones are equipped with sophisticated software that automatically adjusts exposure, focus, and even low-light performance. While you might not have the same level of control as with a DSLR or mirrorless camera, a smartphone can still produce some impressive shots, especially in well-lit environments. I have found that the smart phone is quick & easy, but it can still give you some amazing photos.
For those just starting out, using a phone at concerts or events is a great way to practice composition and timing without being overwhelmed by the technical details of more advanced cameras. As with a professional camera, there are so many things to remember & that can be quite overwhelming. Just remember to use the highest quality settings available, keep the lens clean, and experiment with angles to make the most of what your phone offers.
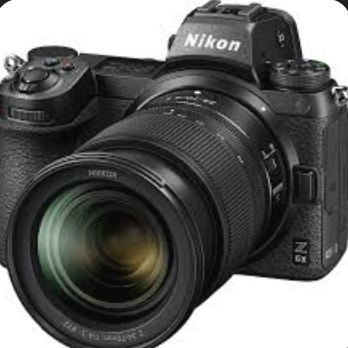
  •  Nikon Z6ii Setup. 
  • When it comes to more serious photography, particularly in challenging low-light conditions like gig, stepping up to a mirrorless camera like the Nikon Z6ii, can make a world of difference. To help capture the energy and atmosphere of a live music event, it’s important to have the right settings dialled in. Also, the 24-70 mm lens can help with that, as it can get you up close to the action.
For starters, ISO is crucial, as I have found out the hard way. For you have the ISO not low like on 1000, then your photos will be very dark. So, to get the photo, so you can see it. Set your ISO on around 3200 to 6400, so that way the photos are light enough you to see it on the cameras screen at the back of the camera. The Nikon Z6ii handles higher ISOs very well, so for concert photography, it’s recommended to set your ISO between 3200 to 6400. This will allow more light into the sensor, helping to reduce noise and make your images clearer, even in dimly lit venues. Next, your F-stop should be around 5.6, giving you a decent depth of field while still letting enough light in. Finally, your shutter speed should be set at around 1/100th of a second. This speed strikes a balance between capturing movement without too much blur while still allowing enough light into the shot.
  • Aperture Priority Mode 
Personally, I like to shoot in Aperture Priority mode, as when I get to a gig, I do loss myself in the action of the gig. So, for beginners, this mode allows you to set the aperture (or F-stop), and the camera automatically adjusts the shutter speed to maintain proper exposure. By using Aperture Priority, you can focus on managing depth of field, which is especially important for concert photography, where you often want to isolate the performers from the background. With this setting, I typically leave the F-stop at 5.6, and the camera does the heavy lifting of adjusting the shutter speed based on the lighting conditions.
That said, even in Aperture Priority, it's important to keep an eye on your shutter speed. If it gets too low, you risk motion blur. If you’re reviewing your shots later in Lightroom Classic or Photoshop, you’ll be able to see which shutter speeds worked best, allowing you to adjust on the fly at your next shoot.
Overall, the Nikon Z6ii is a solid choice for beginner to intermediate photographers (as I have found out, this camera is awesome), and with these settings, you can get well-exposed, sharp concert shots that capture the mood and motion of the performance. Whether you’re just starting with a phone or leveling up to a more advanced camera, understanding the right settings and techniques will go a long way in improving your photography skills.
I have shot my hole portfolio was shot, with the Nikon Z6ii with the 24-70mm lens and I am super proud of it. I can not recommend that time enough, as it has helped me out a lot.